
Entering the world of metal forming requires a strong foundation in the correct setup and operation of stamping equipment. For those just beginning, understanding steel stamping strip starting procedures is essential for both safety and productivity. This guide provides a practical, step-by-step overview tailored for new operators, emphasizing safe practices, equipment preparation, and process optimization.
Mastering these initial steps not only helps prevent equipment damage and material waste but also ensures consistent part quality. Whether you’re working with progressive dies or simpler setups, following proper protocols is crucial. For those handling coated steels, reviewing best practices for stamping coated steels can further enhance your results and minimize surface defects.
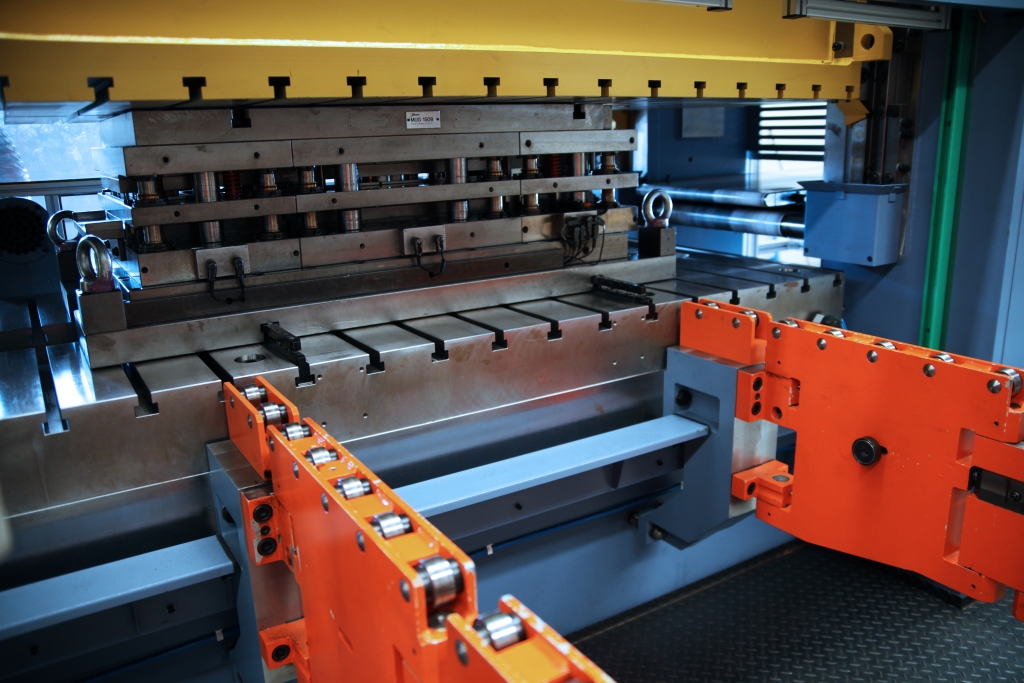
Understanding the Basics of Strip Setup
Before starting any stamping operation, it’s important to grasp the fundamental concepts behind strip feeding and die alignment. The strip, usually a coil of steel, must be positioned accurately to ensure each stroke of the press produces a quality part. Incorrect setup can result in misfeeds, die damage, or even safety hazards.
- Material Inspection: Begin by checking the steel strip for defects such as rust, dents, or surface contamination. Damaged material can cause jams or poor-quality parts.
- Die Preparation: Ensure the die is clean, properly lubricated, and securely mounted. Verify that all fasteners are tight and that the die is free from leftover scrap or debris.
- Press Readiness: Confirm that the stamping press is in good working order, with all safety guards in place and emergency stops tested.
For a deeper understanding of how die components contribute to process stability, consider reading about the role of bolster plates in stamping stability.
Step-by-Step Guide to Steel Stamping Strip Starting Procedures
Following a systematic approach to starting a new strip is vital for both efficiency and safety. Here’s a breakdown of the essential steps:
- Load the Coil: Place the steel coil onto the decoiler, ensuring it is centered and securely clamped. Adjust the tension to prevent slack or excessive pull.
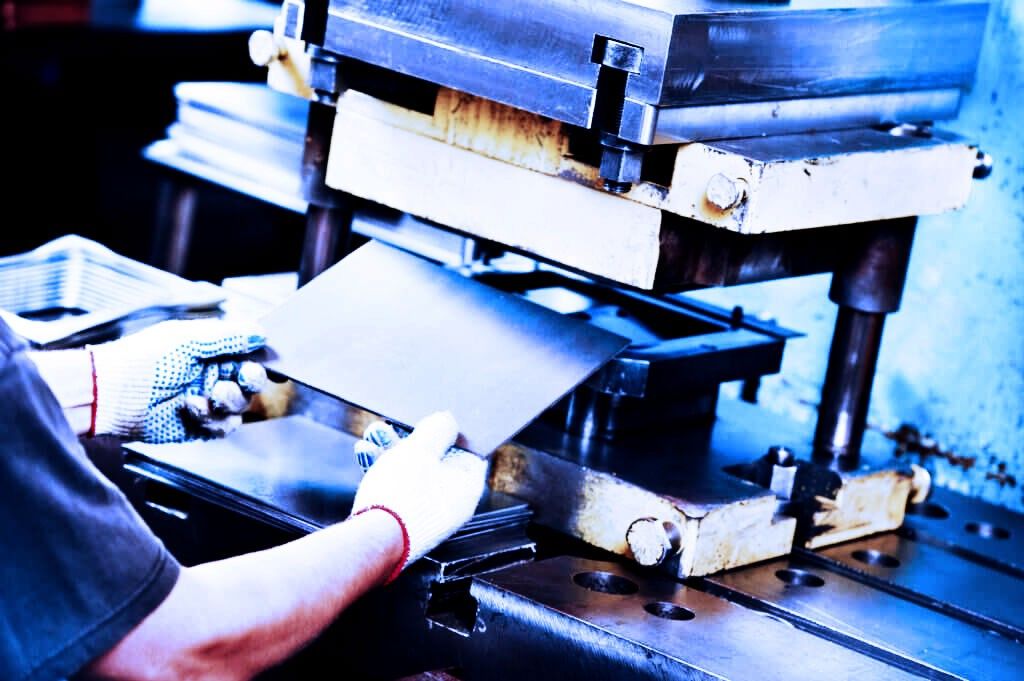
- Thread the Strip: Feed the leading edge of the strip through straighteners and guides. Make sure the strip is flat and free of twists or bends.
- Align with the Die: Carefully insert the strip into the die’s entry point, aligning it with pilot pins or alignment marks. This ensures each blank is cut in the correct position.
- Set Feed Length: Adjust the feed mechanism to match the die’s pitch. Incorrect feed length can cause misalignment and part defects.
- Test Feed: Slowly jog the press or use manual feed to advance the strip through the die. Check for smooth movement and proper alignment at each station.
- Secure Strip End: If necessary, clamp the strip’s leading edge to prevent shifting during the first few strokes.
- Run First Parts: Operate the press at a reduced speed to produce the first few parts. Inspect these for dimensional accuracy and surface quality.
- Monitor and Adjust: Make minor adjustments to the feed, guides, or die as needed. Only increase press speed once consistent quality is confirmed.
Key Safety Measures for New Operators
Safety is paramount in any stamping environment. New operators must be diligent in following established protocols to prevent injuries and equipment damage. Here are some critical safety practices:
- Personal Protective Equipment (PPE): Always wear safety glasses, gloves, and steel-toed boots. Hearing protection may also be required in noisy environments.
- Machine Guards: Never bypass or remove safety guards. These are designed to protect operators from moving parts and flying debris.
- Emergency Stops: Familiarize yourself with the location and operation of all emergency stop buttons.
- Clear Communication: Use clear hand signals or verbal communication when working with a team. Confirm that everyone is ready before starting the press.
- Regular Training: Participate in ongoing safety training and review updated procedures as needed. For more detailed safety guidance, review this comprehensive metal stamping safety resource.
Common Challenges and Troubleshooting Tips
Even with careful preparation, issues can arise during the strip starting process. Here are some frequent problems and practical solutions:
| Issue | Possible Cause | Solution |
|---|---|---|
| Strip Misalignment | Improper guide setup or feed length | Recheck guides and adjust feed settings |
| Material Jams | Twisted strip or debris in die | Remove strip, clear die, and rethread |
| Poor Part Quality | Incorrect die alignment or worn tooling | Inspect and realign die; replace worn parts |
| Feed Slippage | Insufficient tension or worn rollers | Increase tension; inspect and replace rollers |
For operators interested in improving hole quality, understanding the impact of punching clearance on hole quality can be especially valuable.

Optimizing Process Efficiency and Quality
Once the initial setup is complete and the press is running smoothly, ongoing monitoring and optimization help maintain high productivity and consistent part quality. Here are some tips for new operators:
- Regular Inspections: Periodically check strip alignment, die condition, and feed accuracy throughout the production run.
- Lubrication: Ensure both the strip and die receive adequate lubrication to minimize wear and prevent sticking.
- Documentation: Record setup parameters and any adjustments made. This information is valuable for troubleshooting and future setups.
- Continuous Learning: Stay updated on new techniques and technologies. Reading about understanding work hardening in steel stamping can provide insights into material behavior and process improvements.
Frequently Asked Questions
What is the most important safety step before starting a steel stamping strip?
The most critical safety step is to ensure all machine guards are in place and functioning, and to verify that emergency stops are accessible and operational. Always wear appropriate PPE and confirm the area is clear of unnecessary personnel before beginning any operation.
How can I prevent misfeeds during the strip starting process?
To avoid misfeeds, carefully align the strip with the die’s entry point and ensure the feed mechanism is set to the correct pitch. Use pilot pins or alignment marks, and conduct a slow, manual test feed before running the press at full speed.
Why is it important to inspect the first few stamped parts?
Inspecting the initial parts allows you to catch alignment errors, surface defects, or dimensional inaccuracies early. Making adjustments at this stage prevents larger batches of defective parts and reduces material waste.
How does punching clearance affect hole quality in steel stamping?
Punching clearance plays a significant role in the quality of holes produced during stamping. Too little clearance can cause burrs and tool wear, while too much can result in poor edge quality. For more details, see the article on the impact of punching clearance on hole quality.
Conclusion
For new operators, mastering the essential steps of strip setup and understanding the nuances of the process can make a significant difference in both safety and productivity. By following these guidelines, staying vigilant about safety, and committing to ongoing learning, you’ll build a solid foundation for success in metal stamping operations.