
Are you looking to add a unique touch to your garden with metal sculptures? The secret to creating stunning garden art lies in the application of a patina finish. This technique can transform ordinary metal pieces into extraordinary works of art, adding character and charm to any outdoor space. Whether you’re a seasoned artist or a DIY enthusiast, understanding the process of applying a patina finish can elevate your garden decor to a new level.

What is a Patina Finish?
A patina finish is a layer that forms on the surface of metals like copper, bronze, and steel, through chemical reactions or natural weathering. This finish can produce a range of colors, from blues and greens to rich browns and reds, depending on the metal and the method used. The result is a distinctive, aged appearance that adds depth and interest to metal art pieces.
Why Use a Patina Finish for Garden Art?
Using a patina finish for garden art offers several benefits. It not only enhances the aesthetic appeal of your sculptures but also provides a protective layer that can prevent corrosion. This makes it an ideal choice for outdoor installations where metal pieces are exposed to the elements. Moreover, the unique colors and textures of patina finishes can complement the natural beauty of a garden setting.
The Art of Patination
Creating a patina finish involves a combination of science and artistry. The process can be expedited using chemical solutions or allowed to occur naturally over time. For those interested in DIY projects, there are numerous resources available that provide step-by-step instructions on how to achieve various patina effects. You can explore different techniques and find the one that best suits your artistic vision.
Materials Needed for Patina Finishes
- Metal sculpture or surface
- Patina solution or chemicals
- Spray bottle or brush
- Protective gear (gloves, goggles)
- Sealant or wax (optional)
Step-by-Step Guide to Applying a Patina Finish
1. Prepare the Surface: Clean the metal surface thoroughly to remove any dirt, grease, or rust. This ensures that the patina solution adheres properly.
2. Apply the Patina Solution: Using a spray bottle or brush, apply the patina solution evenly across the metal surface. Follow the instructions on the product for the best results.
3. Allow the Reaction to Occur: Depending on the desired effect, allow the patina to develop over several hours or days. You can reapply the solution for a more intense color if needed.
4. Seal the Finish: Once the desired patina is achieved, apply a sealant or wax to protect the finish and enhance its durability.
Creating Unique Garden Art
With a patina finish, you can create one-of-a-kind garden art that reflects your personal style. Whether you’re crafting a large metal sculpture or a small decorative piece, the possibilities are endless. Consider experimenting with different patina solutions and application techniques to discover new effects and textures.
Maintaining Patina-Finished Art
To keep your patina-finished art looking its best, regular maintenance is essential. This includes cleaning the surface gently with a soft cloth and reapplying sealant as needed. Avoid harsh chemicals that can damage the patina.
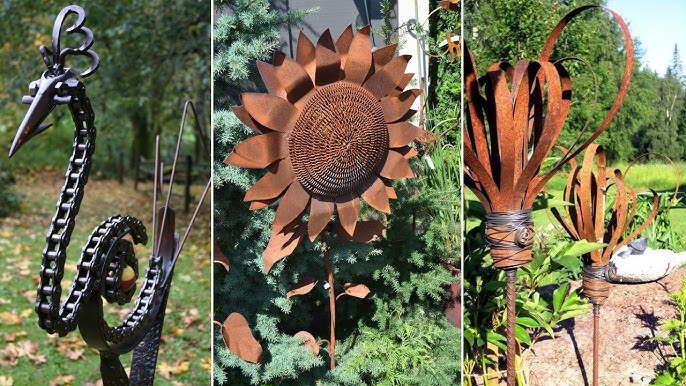
Inspiration for Patina Garden Art
If you’re looking for inspiration, consider visiting local gardens or art installations that feature patina-finished sculptures. You can also find ideas online, such as Rusted Metal Garden Art, which showcases a variety of metal art pieces enhanced by patina finishes.
Conclusion
Adding a patina finish to garden art is a wonderful way to enhance your outdoor space with unique and visually striking pieces. Whether you’re an artist or a hobbyist, this technique allows you to explore your creativity and bring a touch of elegance to your garden. By understanding the process and experimenting with different methods, you can create beautiful and lasting art that will be admired for years to come.

FAQs
What types of metals can be used for patina finishes?
Metals such as copper, bronze, and steel are commonly used for patina finishes due to their ability to react with patina solutions and develop rich colors.
Can I apply a patina finish to existing garden art?
Yes, you can apply a patina finish to existing metal sculptures or decor pieces. Ensure the surface is clean and free from any previous coatings or treatments.
How long does it take for a patina to develop?
The development time for a patina finish can vary depending on the method and solution used. It can take anywhere from a few hours to several days to achieve the desired effect.
For more information on creating stunning DIY metal sculptures, visit DIY Metal Sculptures.
This article contains affiliate links. We may earn a commission at no extra cost to you.